Note: This page has been written with included pictures in mind. I don’t have all of these photos taken yet, but thought it more important to get some information out there for the time being. I am currently working a billet of W’s and I’m trying to fill in the pictures as I go. In the meantime, feel free to ask me any questions you’d like to help clarify this procedure.
To call W’s a “pattern” is somewhat of a misnomer as it’s really more of an operation (like twisting or laddering) that can be used in creating a myriad of patterns. However, as most folks tend to think of it as a pattern, this discussion on the basics of it will be in that context. It should be noted though that just plain W’s isn’t even the tip of the iceberg of what can be done with this technique. W’s is indeed the basis of several other patterns.
The history of the development of this pattern is somewhat unclear, but it has really come into it’s own in the last 5 years or so. It is very easy see though how it could have evolved from a single, simple accident in forging where a piece was simply forged in the wrong direction.
This description of W’s will detail a low layer count W’s for simplicity of illustration, but you can start with a higher initial layer count for a finer pattern if you like.
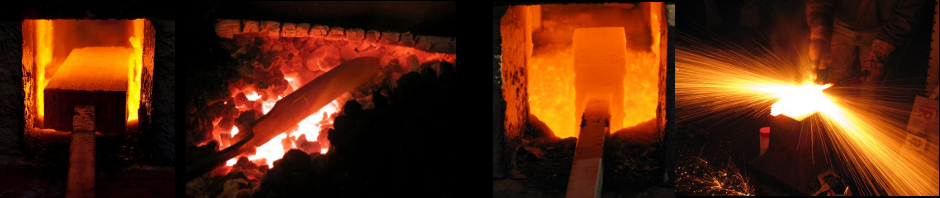
In order to create W’s, start with an initial layup of a simple, straight laminate. In this case, it is 21 layers of 1084 and 15n20.

Set the initial weld, and forge the billet down to 1/2 to 2/3rds of its original height. This is just good forging practice after a weld to ensure that the welds remain solid as the next part of the patterning will really test them. You’ll also notice that I let the sides “bulge” as I forged it down. This is to allow me to get more cross-sectional reduction in the next step.

Then, turn the billet 90 degrees to one side and begin to forge down on the sides.
This is where the “magic” of W’s begins. As the billet is drawn down on it’s side, the layers begin to buckle. This buckling is what forms the peaks (or valleys, depends on the specific point of view of the observer…) in the pattern. It’s important to note that this flattening of the billet sideways must be pretty extreme for this pattern to work out right. You really should be reducing the cross-section of the billet by 70-80%. Here you can see that the billet that was over 2″ wide has been drawn down to just over 1/2″ thick.

Also, forging the edges should be avoided at this point as much as possible. Forging the edges back in can undo the buckling that is so critical to success in this pattern. this piece was not forged on the edges at all. As can be seen, it grew dramatically in width as a result. Here, it is about 2 3/4″ wide.

Here’s an example of what this looks like at this stage of the patterning:

But that looks more like a ‘V’ or a ‘U’, or a bell curve, so we’re not done. Now that the billet has been flattened, it needs to be re-stacked and welded again to “stack up” the buckled layers and start to get the W’s pattern we’re all familiar with. Generally, a minimum of 5 layers on this re-stacking for this pattern to have it start to be recognizable as W’s.
At this point it should be noted that this stage of the patterning can also be done by hot cutting and folding rather than cutting, grinding, and re-stacking. However, the initial reduction of the billet sideways must still be by 70-80%. Subsequent folds can have less reduction than this, but it is a critical step in the beginning of patterning.
Here’s a sample of W’s steel after re-stacking the sideways forged pieces:
It can now be seen that there are now multiple buckled pieces next to each other. The more reduction is performed after flipping the billet sideways, the higher the peaks should appear. Continue re-stacking or folding at this point until the desired activity for your specific work has been reached.
One important thing of note with W’s is that the pattern is in the end of the bar. The sides of the billet are indeed, pretty boring. Further work must be done from this point to expose the W’s pattern to the side of a billet. There are many possibilities of how to do this such as laddering, twisting, or treating it as a mosaic pattern.
Pingback: Filling in the W’s tutorial today | Pattern Welding Information